

Christmas Countdown: Two easy DIYs to make the holidays crafty
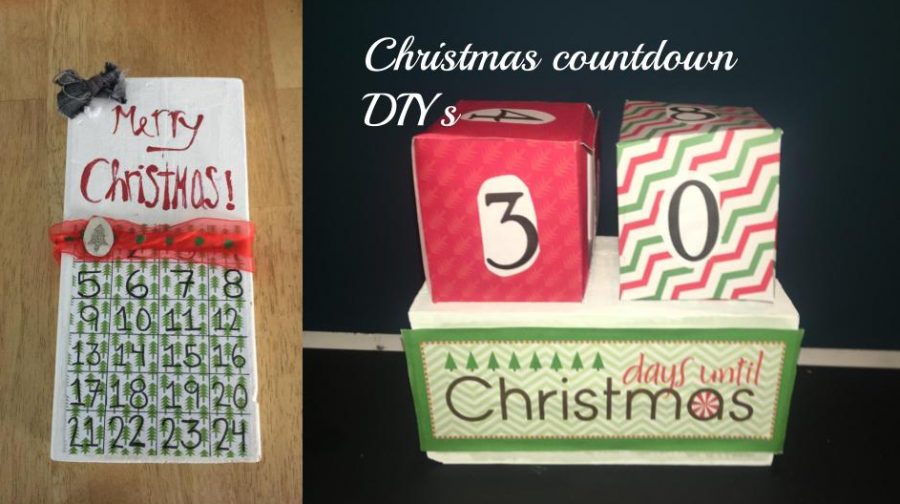
Julie’s finished countdown DIY (left) and Grace’s finished countdown DIY (right).
November 19, 2018
For the holidays, DIY projects are a great way to save money and prepare gifts for family and friends. They can be really fun. There are a lot of DIY blog pages with tons of cute ideas.
An extremely popular DIY for the holiday season is a Christmas countdown. The idea is to change the date on it every day as Christmas Eve approaches. Changing the date on a board or opening a box with a surprise are two ways to craft a countdown.
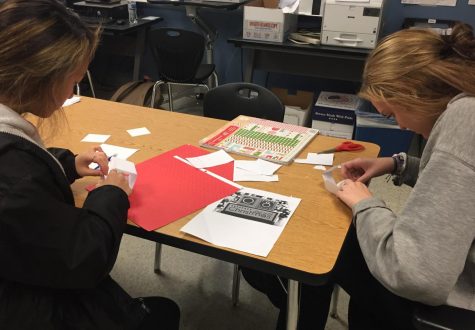
Grace Gaydosh and Julie Walker make their DIY projects.
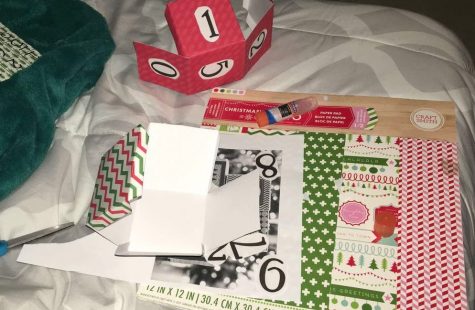
Grace Gaydosh – Block Countdown (approximately 2 hours) Idea published in See Vanessa Craft
Materials:
2 pieces of different colored Christmas scrapbook paper (12×12)
2 sets of printed holiday numbers (0-9)
Double sided tape
Glue stick
3×8 block of wood
White paint
Paintbrush
Scissors/paper cutter
Grace’s steps:
- Using the scrapbook paper, make 2 cubes 3x3x3 using the online pattern. The cubes should have tabs to make it easier to fold. Make the cubes using different scrapbook paper for each one.
- Search online for numbers 0-9 and print out 2 copies (you could also just write the numbers on the cubes).
- On the first cube, glue the printed numbers: 0,1,2,3,4,5. Put only one number on each side.
- On the second cube, glue the printed numbers: 0,1,2,6,7,8. The number 6 can also be used as the number 9.
Grace Gaydosh
Step 4 - After you have glued the numbers on, use tape or glue to construct the cubes.
- You can hand-make a 3×8 cover for the wood or you can go online and print one off. This will go on the front side of your wood.
- You can buy a block of wood from the store or cut one yourself if you have some lying around. It can be any size, but the size dimensions for this DIY match a 3×8 piece of wood.
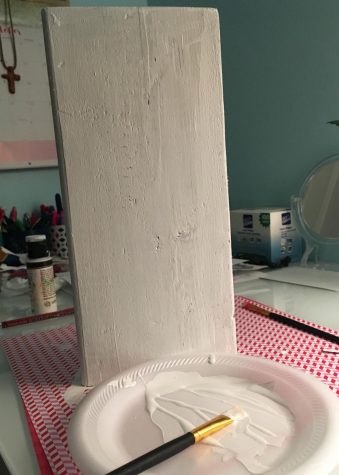
- Paint the block of wood white and let it dry.
*If you print a cover off the internet*
9. After the paint is completely dry, glue the cover onto the front side of the wood block.
*If you draw a cover make sure the paint is dry as well*
10. The DIY is complete! Put the 2 cubes on top of the block of wood and flip the numbers each day counting down to Christmas!
Julie Walker – Countdown board (approximately 2 hours) as featured on
Materials:
A 12” by 7 ” wide piece of wood. The thickness doesn’t matter, although this DIY works best with a wood block that is about 1-2” wide.
White acrylic paint
Thick paintbrush
Glue stick or white glue
Red paint marker
Scrapbook paper cut to fit half of the wood
4 inches of flannel material, any color
Any Christmas earring or pin
Hot glue gun
Julie’s steps:
- Buy a piece of wood, roughly a 12” by 7” wide.
- Choose a piece of patterned scrapbook paper and cut it 6 inches wide and 7 inches long. Divide the paper into 24 squares, so do 6 rows of 4 each.
- With a thick black permanent marker, label each square with the numbers 1-24 on your patterned scrapbook paper. There should only be one number per block.

Julie Walker
Step 3 - Using a large paint brush, cover the entire wood panel with white paint, and wait for it to dry.
Julie Walker
Step 4 - When the paint on the wood is completely dried, take your numbered scrapbook paper and cover the back of it with glue. A glue stick works best with this project.
- Stick the paper at the bottom of the wood with roughly a half inch of space on each side.
- If needed, place a heavy textbook on top of the paper to insure that it sticks to the wood. You can leave the textbook on overnight while the glue dries ( this is optional).
- On the rest of the wood that isn’t covered by paper, use a red paint pen or red paint to write the words “Merry Christmas!” Directly onto the wood.

Julie Walker
Step 8 - To make the slider to keep track of the day, choose any old Christmas earring or pin and cover it in hot glue. Then, cut the hot glue around the earring into a circle.
- Then, hot glue the earring onto a ribbon closed to make a circle fitted to the wood (Wrap the ribbon around the wood for size, take it off and hot glue the two ends together where they fit the wood). This will make a ribbon with a cute touch that can be slid everyday onto a new date!
- As a cute accent, cut a 1” wide by 4-5” long piece of flannel material. Tie it in a bow and hot glue it to any left over white space.